Define staffing requirements with a weekly timetable
Learn how to use SKEDA's weekly staffing template to set staffing requirements, roles, and coverage patterns before generating schedules.
Before SKEDA can generate a schedule, it needs to know your staffing requirements. How many people do you need at each time? Which roles should fill them?
The Weekly Staffing Template is where you define all of this. Think of it as your blueprint for a typical week. Once configured, SKEDA uses it to generate compliant schedules month after month.
Start with your location
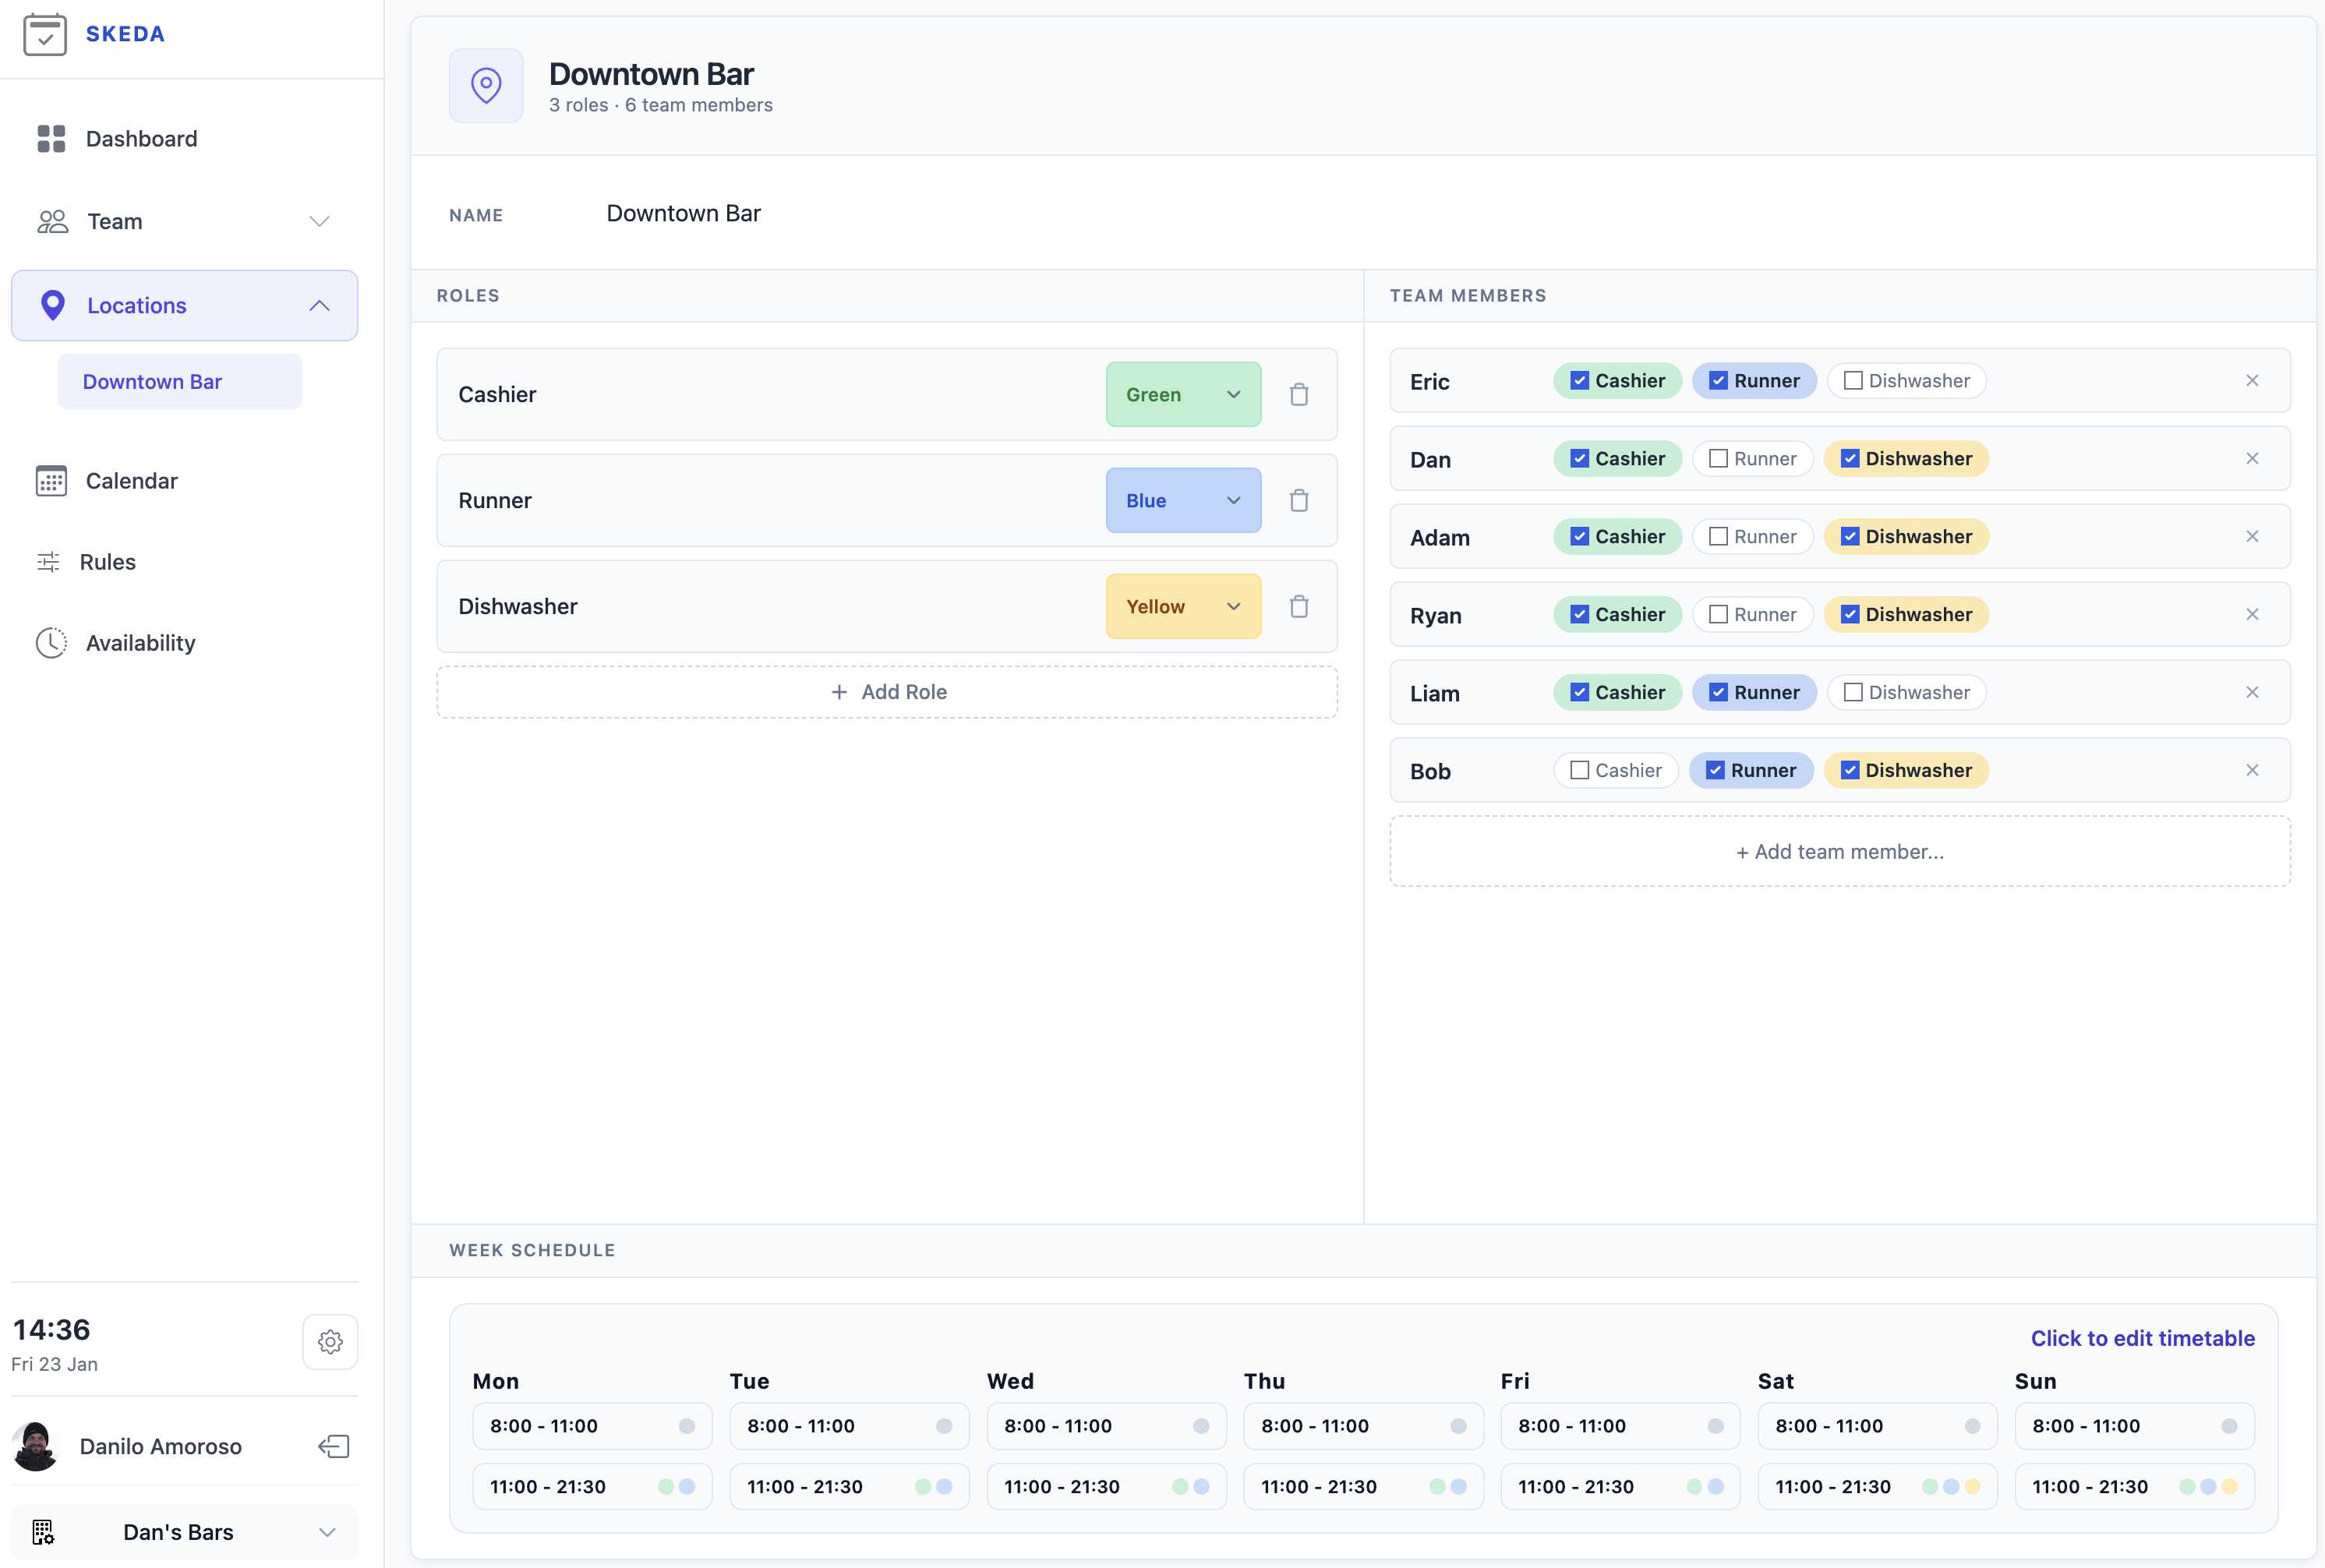
Each location in SKEDA has its own staffing setup. On the location page, you configure three things:
- Roles - The different positions you need to fill (Cashier, Runner, Dishwasher, etc.). Each role gets a color to make schedules easy to read at a glance.
- Team members - The people assigned to this location. Check which roles each person can perform.
- Week schedule - The preview at the bottom shows your current staffing template. Click it to open the editor.
Open the weekly staffing template
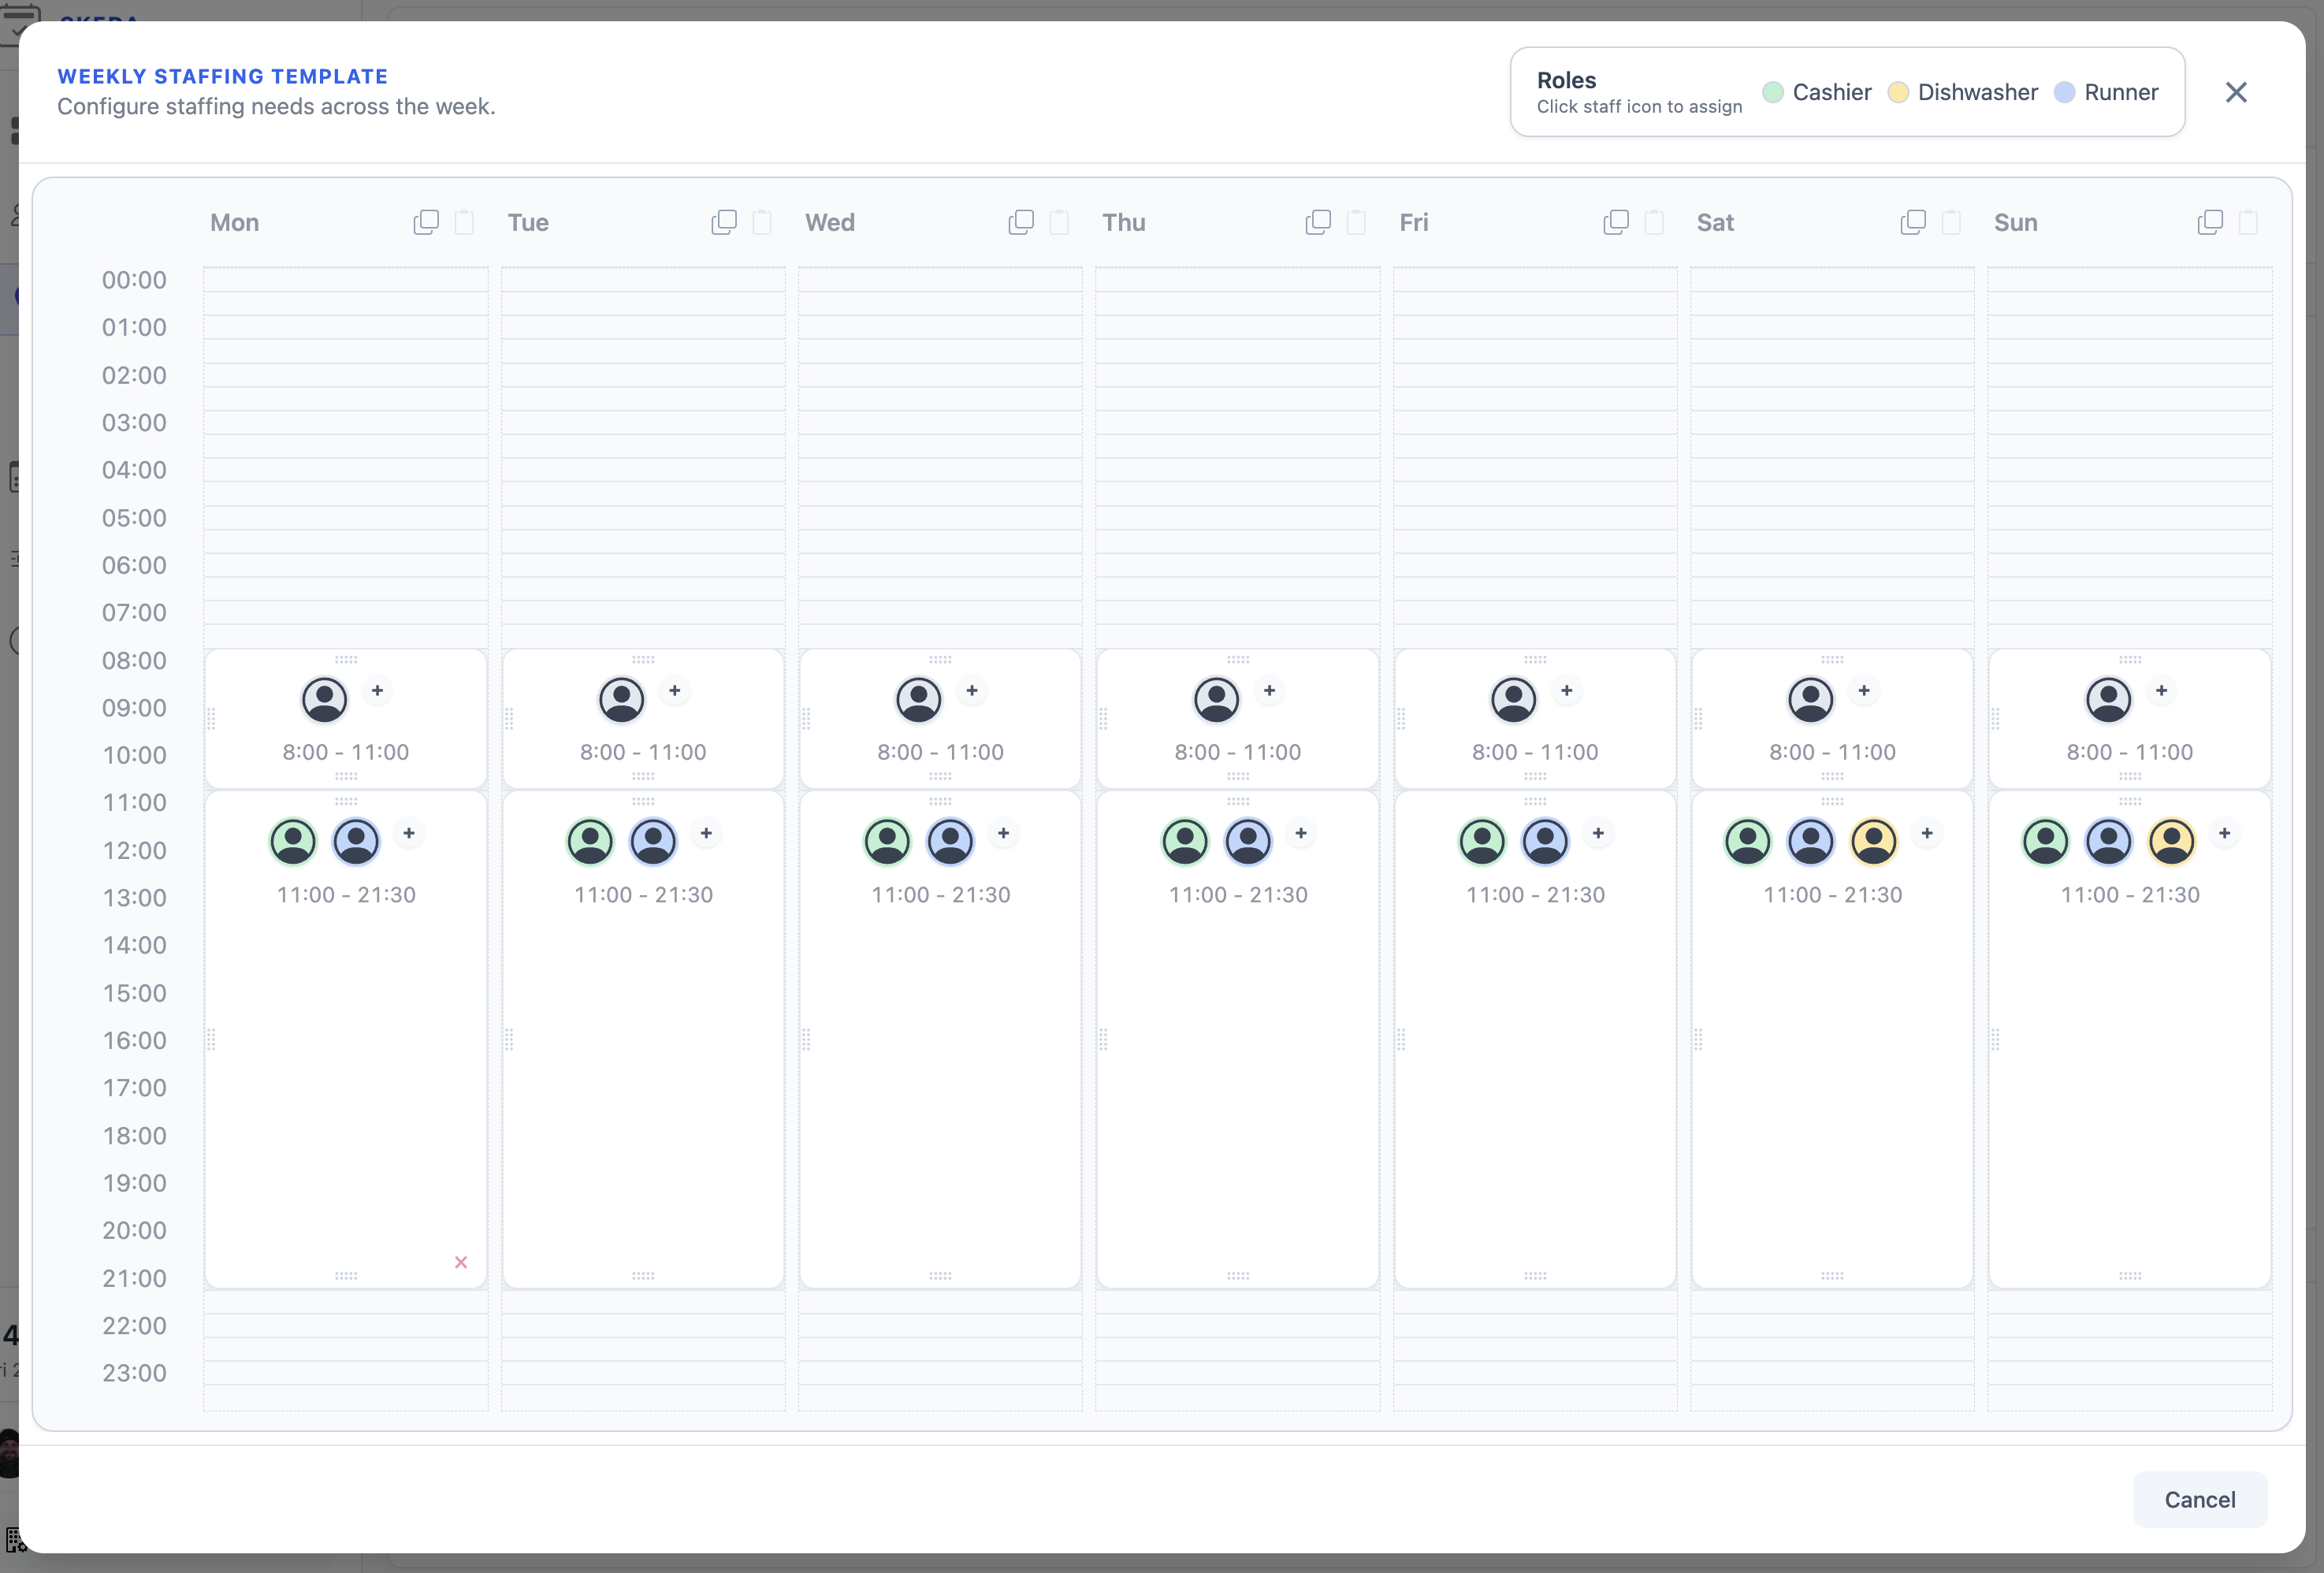
The template editor shows all seven days of the week in a grid format, like in your calendar apps. You can tell SKEDA how many people are needed at each hour of the day, and which role they need. These are not shifts; the edges of the time blocks do not mark the time at which team members need to start and end work.
Because start and end times for shifts can be flexibly assigned depending on scheduling rules and team member preferences, you do not have to worry about any of that now. If you need two people on at all times, create a single block. SKEDA generates multiple shifts to satisfy this requirement and synchronizes team members of the appropriate roles so they can relieve each other.
Note: At the top right, you will see your roles legend. This shows which colors map to which roles.
Add a new time block
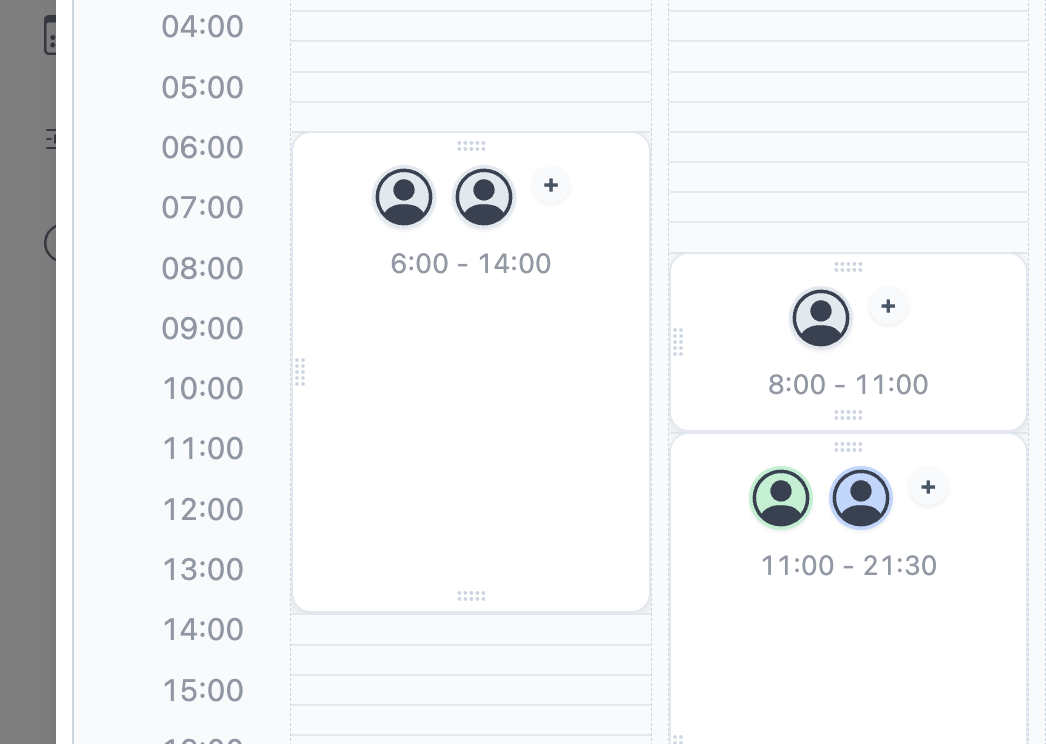
To add staffing to a day, click anywhere in the empty area of the day column. A new block appears with a default duration.
You can drag the edges of the block to adjust its start and end times. Need two people between 6am-2pm? Just drag the handles to match.
Assign a role
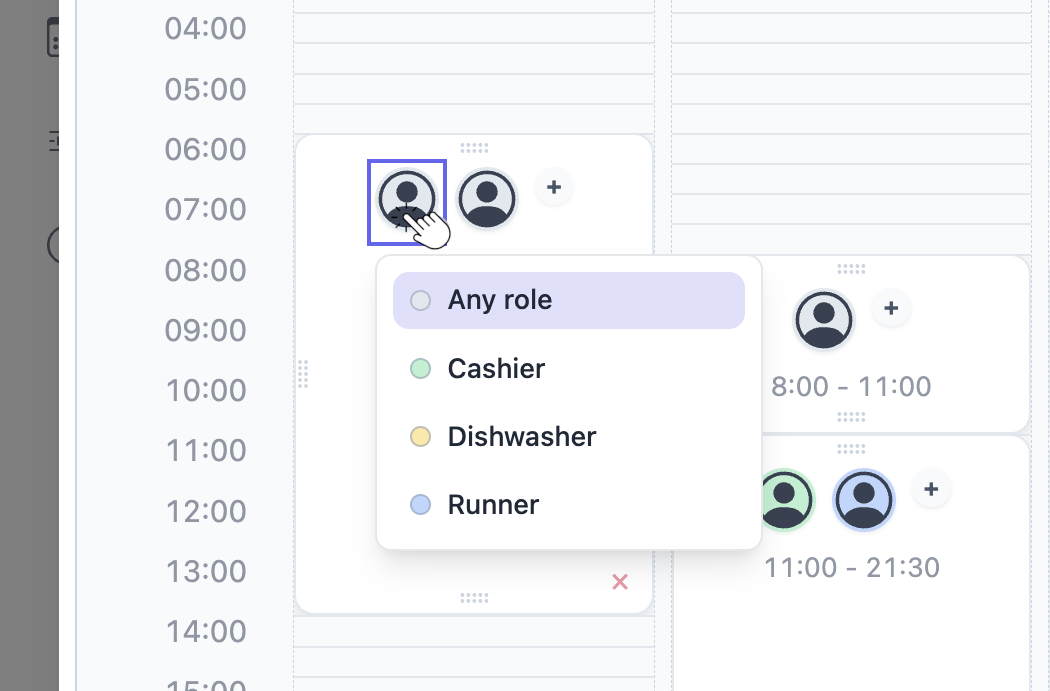
New blocks start with a generic "no specific role required" assignment. This is useful when you want to say "I do not need a specific role, just that somebody is here", but most of the time you will want to assign a specific role. To do that, click the staff icon, then the role you want to assign. The block color changes to match the required role.
Need multiple people for the same block? Click the + button next to the role icon to add another person. You can mix roles too: maybe you need one Cashier and two Runners for the lunch rush.
Copy and paste days
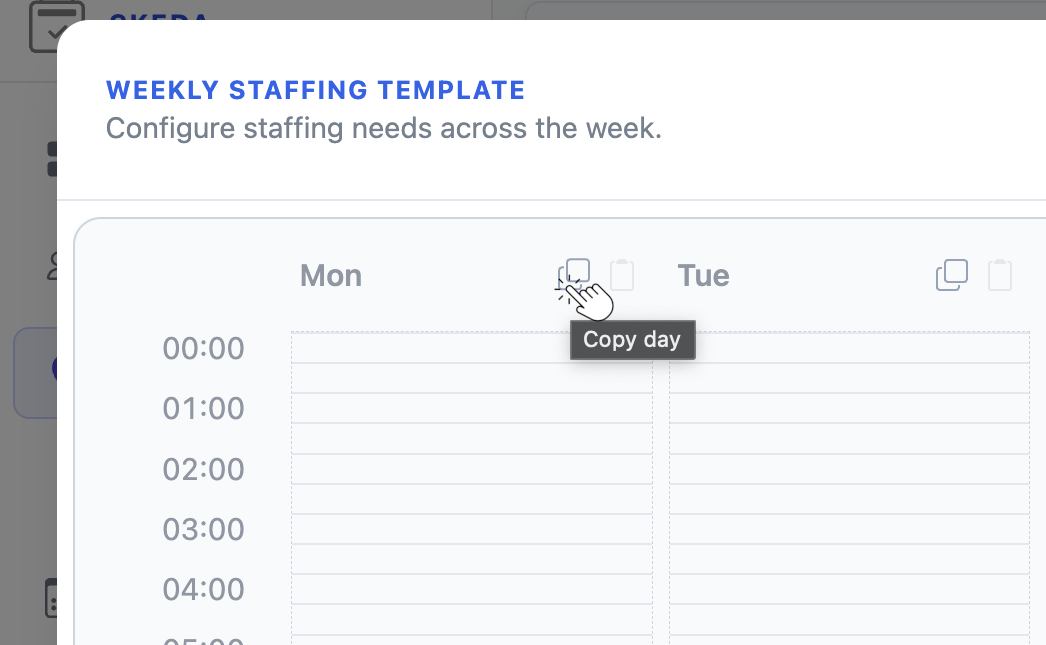
Most businesses have similar staffing patterns across multiple days. Instead of rebuilding Monday's setup for Tuesday through Friday, SKEDA allows you to copy and paste.
Click the copy icon next to any day header. All paste buttons across the week become active.
Click paste on the target day, and the entire staff structure copies over. In this example, Monday's schedule was pasted to Saturday, instantly creating the same two blocks with the same role assignments.
What happens next
Your weekly template becomes the foundation for schedule generation. When you ask SKEDA to create a schedule for a given month:
- It looks at your weekly template to know your usual staffing requirements
- It checks team member availability and preferences
- It applies your rostering rules (maximum shifts per week, rest requirements, etc.)
- It generates an optimal assignment that satisfies all constraints
If you want advice or help configuring your timetable, do not hesitate to reach out info@skeda.app